The Adventures of Lemon Cake (With Custard)
*:・゚✧Lemon Cake's Birth: The process of making my long furby✧:・゚*
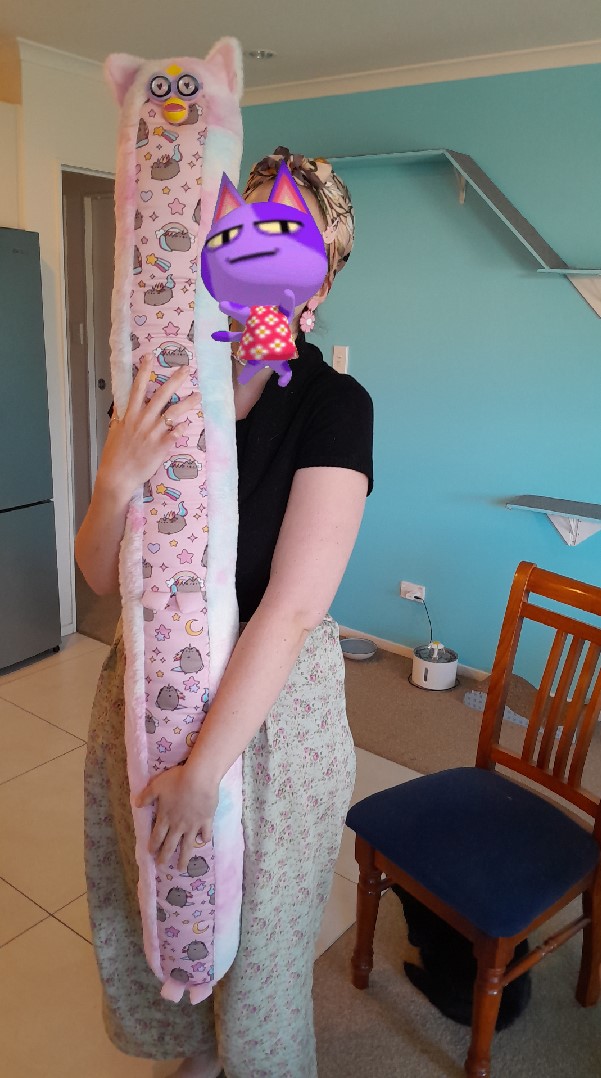
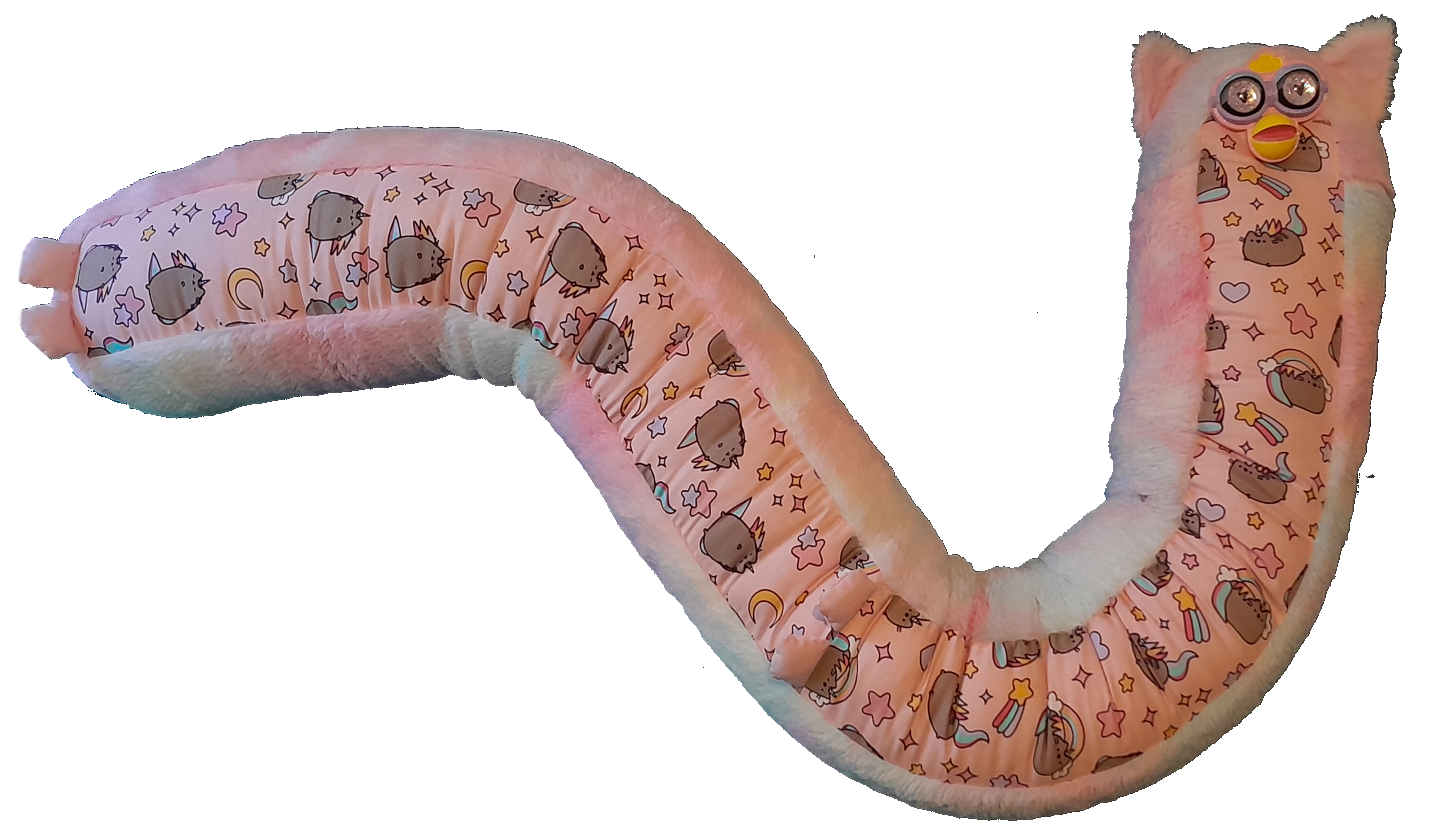
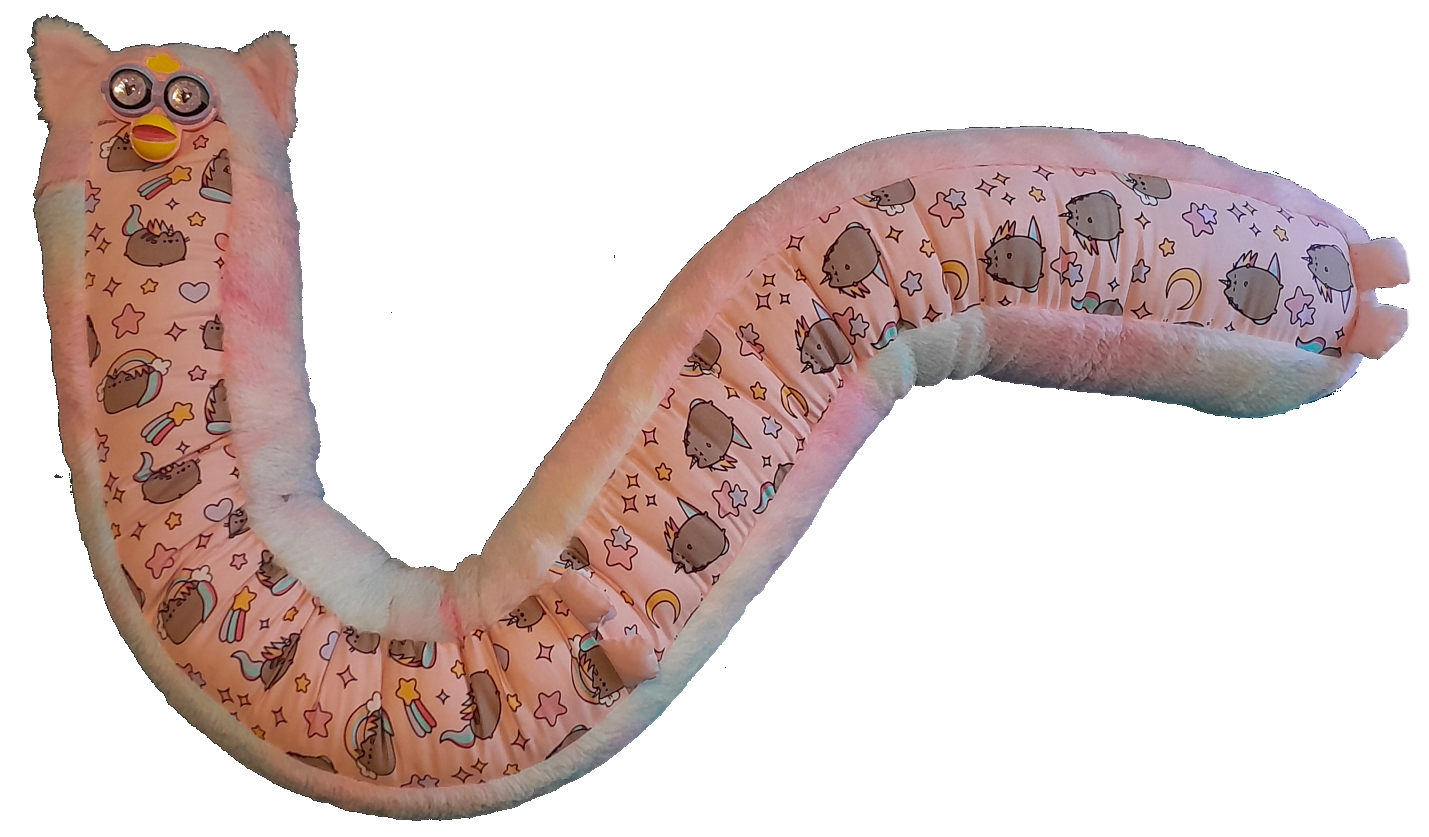
On the 23rd Feb 2024 I finished making my long furby, Lemon Cake (With Custard). This project was sitting at the back of my mind for a really long time, and the actual process of design to completion was about 7 months.
This isn’t meant to be a tutorial for how to make your own! It’s more of a chronological documentation of my process, both for myself to look back on and for anyone else who might be interested! (✿◠‿◠)
Tutorials that I found helpful were:
‘Longifying Your Furby’ by Boots With The Furb on Instructables (including pattern)
'How to make a long Furby’ by The Odd Body on Youtube (following the above pattern)
f3rbaliou5 on tiktok has really useful videos on how to make your own custom eye chips
The beginning
It started in June 2023 when I was working a con, and I went for a walk around the Artist Alley during my break. I stumbled across Sani’s Friend Shack’s booth, and hanging up on the wall was the most gorgeous strawberry long furby that I’d ever seen.
Here it is in all its glory!
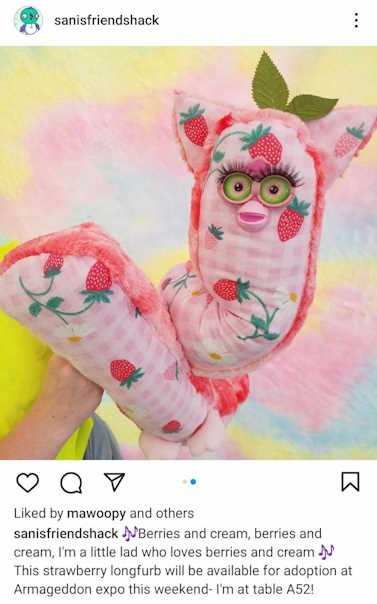
and it can also be seen on the right-hand-side of this photo on their Instagram!
SIDE NOTE, I highly recommend keeping up with Sani’s work and keeping an eye on when they update their store! They are so incredibly talented and create so much cool stuff!! o((>ω< ))o
I couldn’t afford to buy it at the time, but that little guy was stuck in my brain for months afterwards. That was, until I was talking to my partner, and I had the lightbulb moment of, ‘oh. I could make my own long furby!’
I’m very familiar and comfortable with sewing and I make a lot of my own clothes. However, I’d never done a project like this before, and the idea of making a plushie was really exciting.
I spent months thinking about the possibility, and scrolling through the furblr and odd body tags on Tumblr for inspiration!
Finding my fabric
One weekend my partner and I were in Spotlight (think Joann's but in New Zealand) to get some supplies for a costume party, and I had a quick stop by the fabric section to see what I could find.
I knew at this point that I wanted a soft, fluffy body, with a smooth cotton belly strip. I also knew I wanted it to be mainly pink and pastel colours to fit my office and desk setup. And boy oh boy, did Spotlight have what I needed!!

I really love Pusheen, and the colours worked so well with the fluff that I’d already picked out… it was just perfect!! (≧∇≦)ノ
I didn’t buy any fabric then, but I took pictures of the label and barcode to make sure I could find it again later.
The faceplate and spine
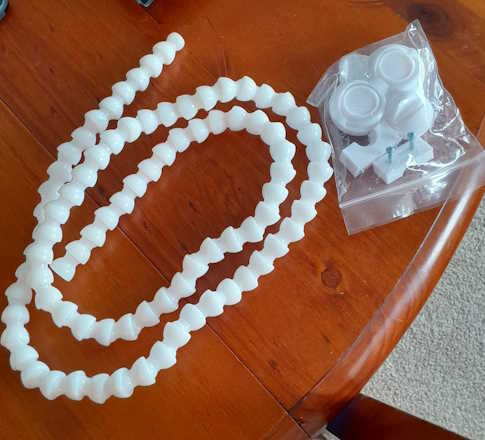
I knew that I wanted my furby to have an articulated spine so that I could have it posed for photos, and have it sitting in different positions on my desk. I also knew that I wanted to use a vegan faceplate.
I went with the Large EZ Faceplate Mount Kit With 4 inch Spine by Mr D’s Printed Creations on Etsy. Shipping was a bit pricey and took a bit of time to get to me, as the shop is based in North Carolina USA and I’m in New Zealand. However, I’m really pleased that I went with this option, as the quality of the print on the faceplate is incredibly high, and the mounting system proved to be really intuitive and sturdy. I absolutely recommend ordering from this store!
The shipment arrived in mid November 2023, but unfortunately I got really busy in December and wasn’t able to start work until January 2024.
Construction!!
Jan 23rd
Buying fabrics and paints.
The fluffy fabric is 100% polyester faux fur, and the pusheen fabric is 100% cottin poplin. I also got a small 50cmx50cm square of pink 100% cotton fabric for the inner ears and feet. The stuffing I was originally planning on getting was out of stock, but the 1kg bag of recycled polyester fill was on special, so that's what I got!
I got Folk Art matte acyrlic paints in White, Light Blue, Light Lavender, Baby Pink, and Sunny Yellow, and one tube of Folk Art Glitterific in Pink Neon!


Jan 26th
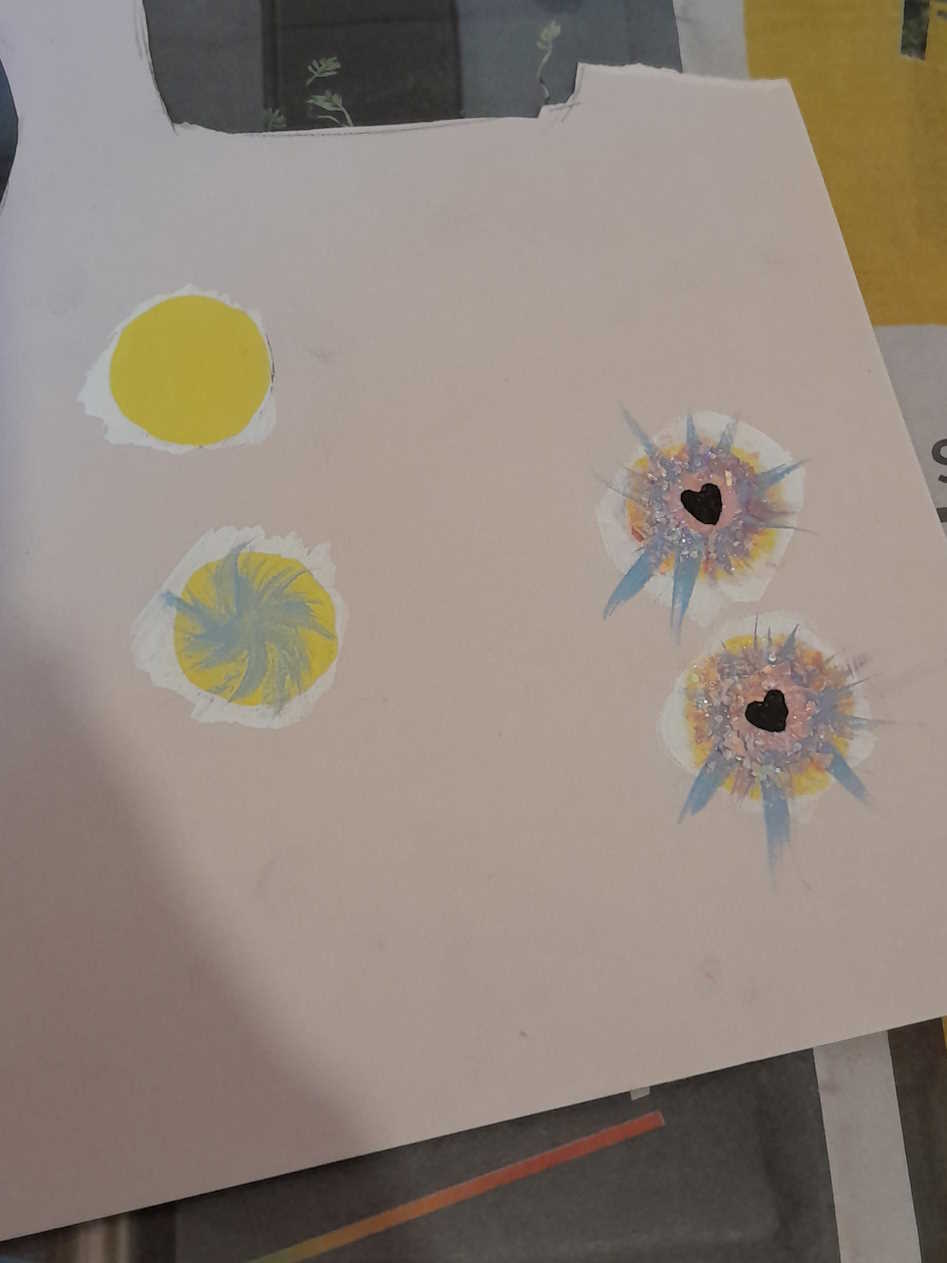
Painting 3 base coats of white on the faceplate, and drafting eye designs
Jan 27th
Painted the colours onto the face plate, and more eye chip drafting.

Jan 28th
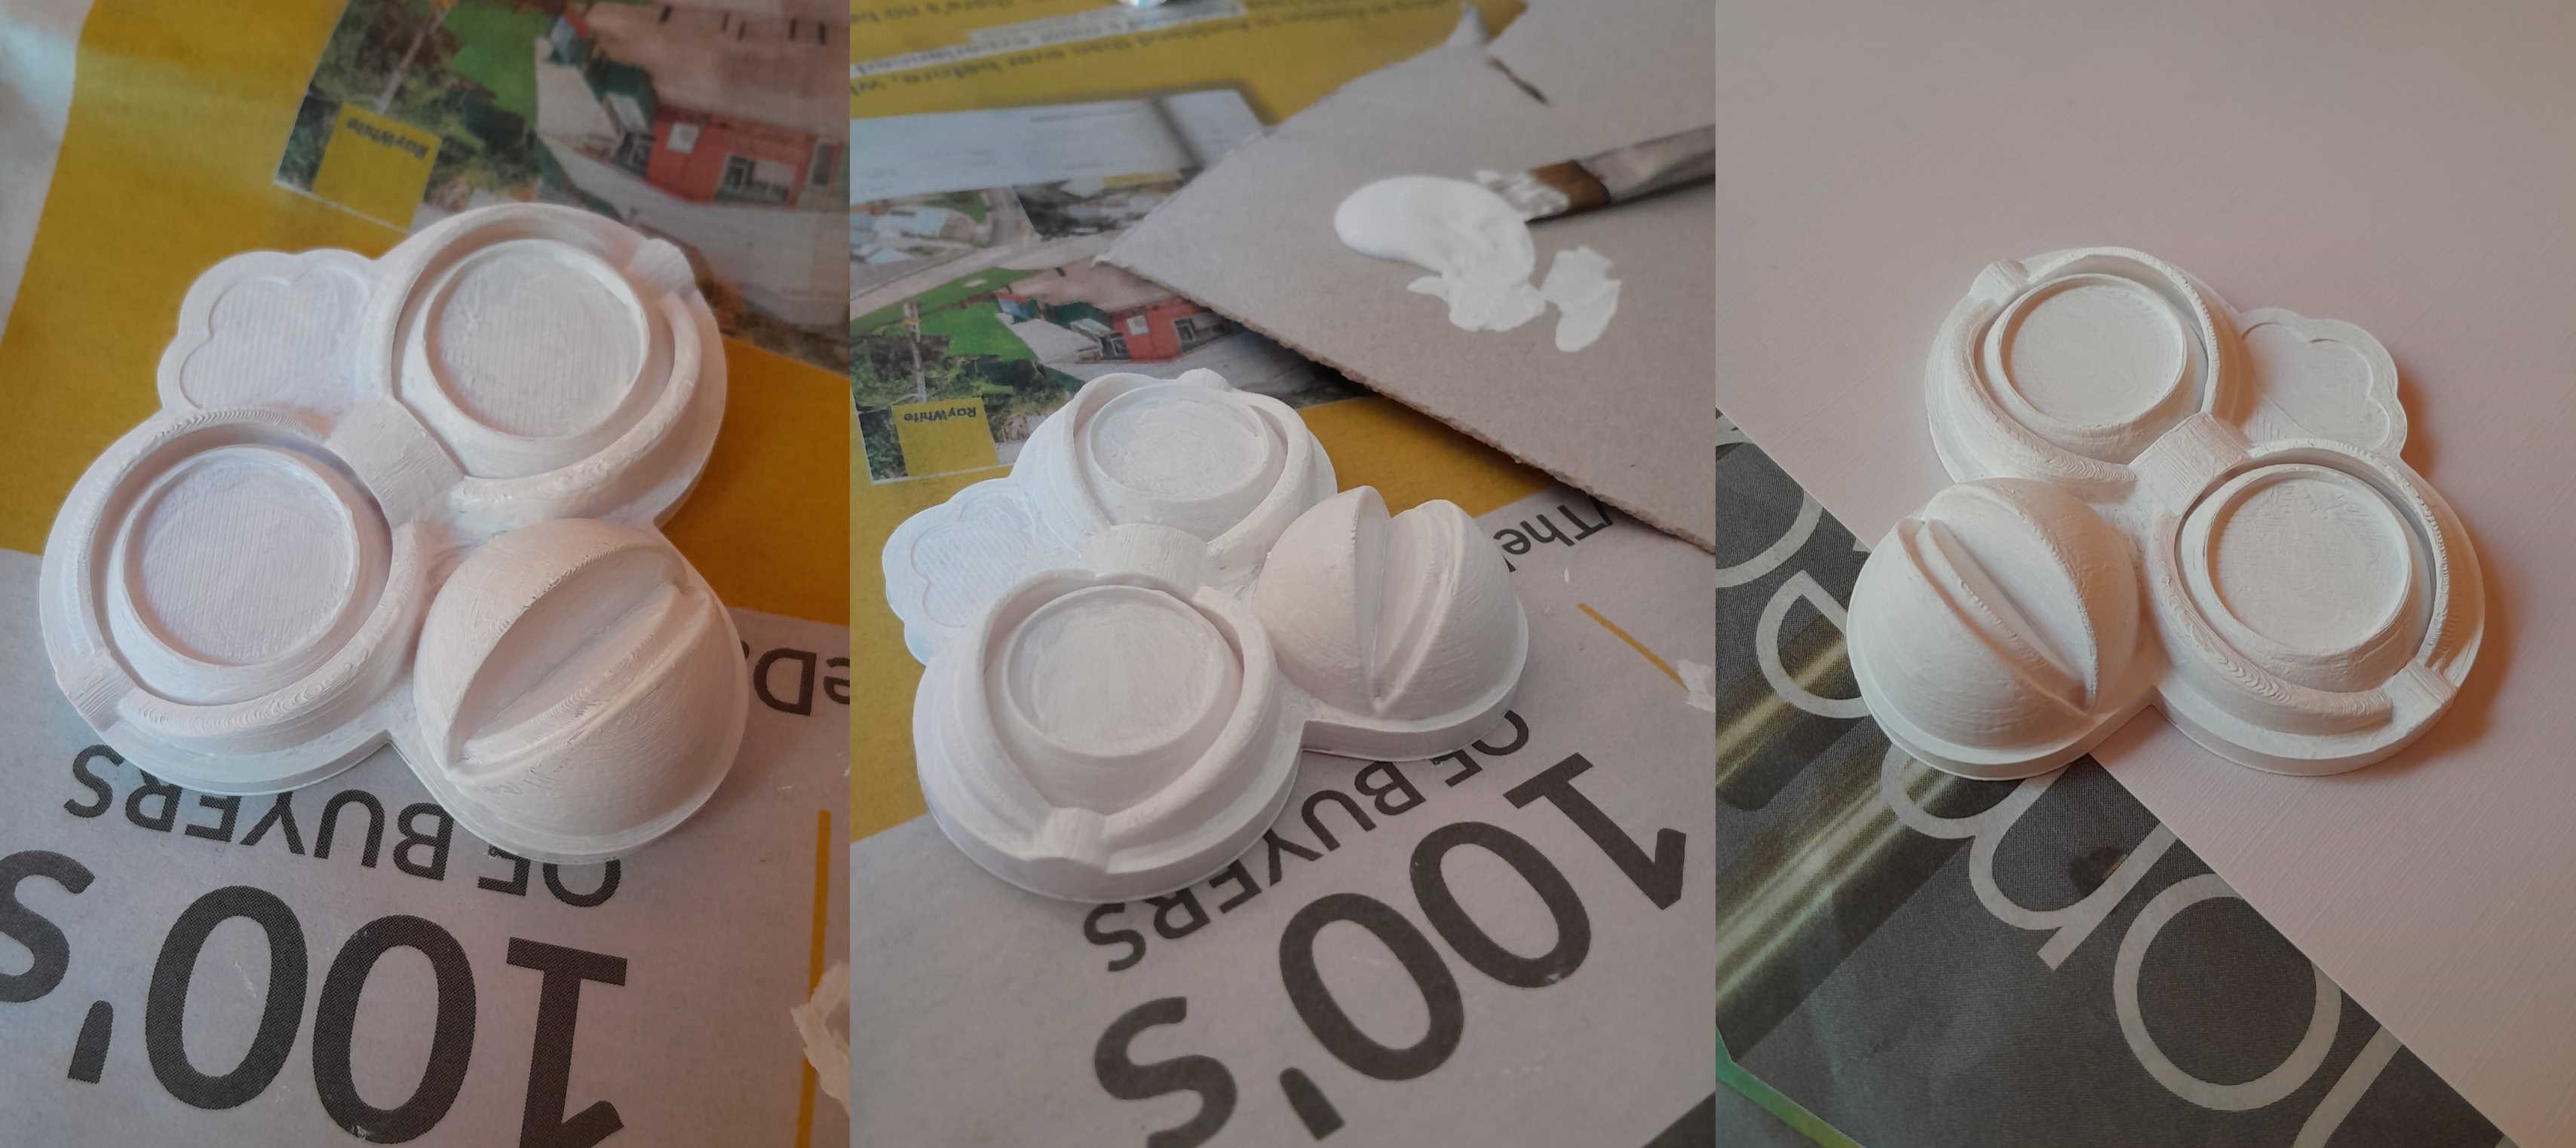
I sealed the dried faceplate with mod-podge...

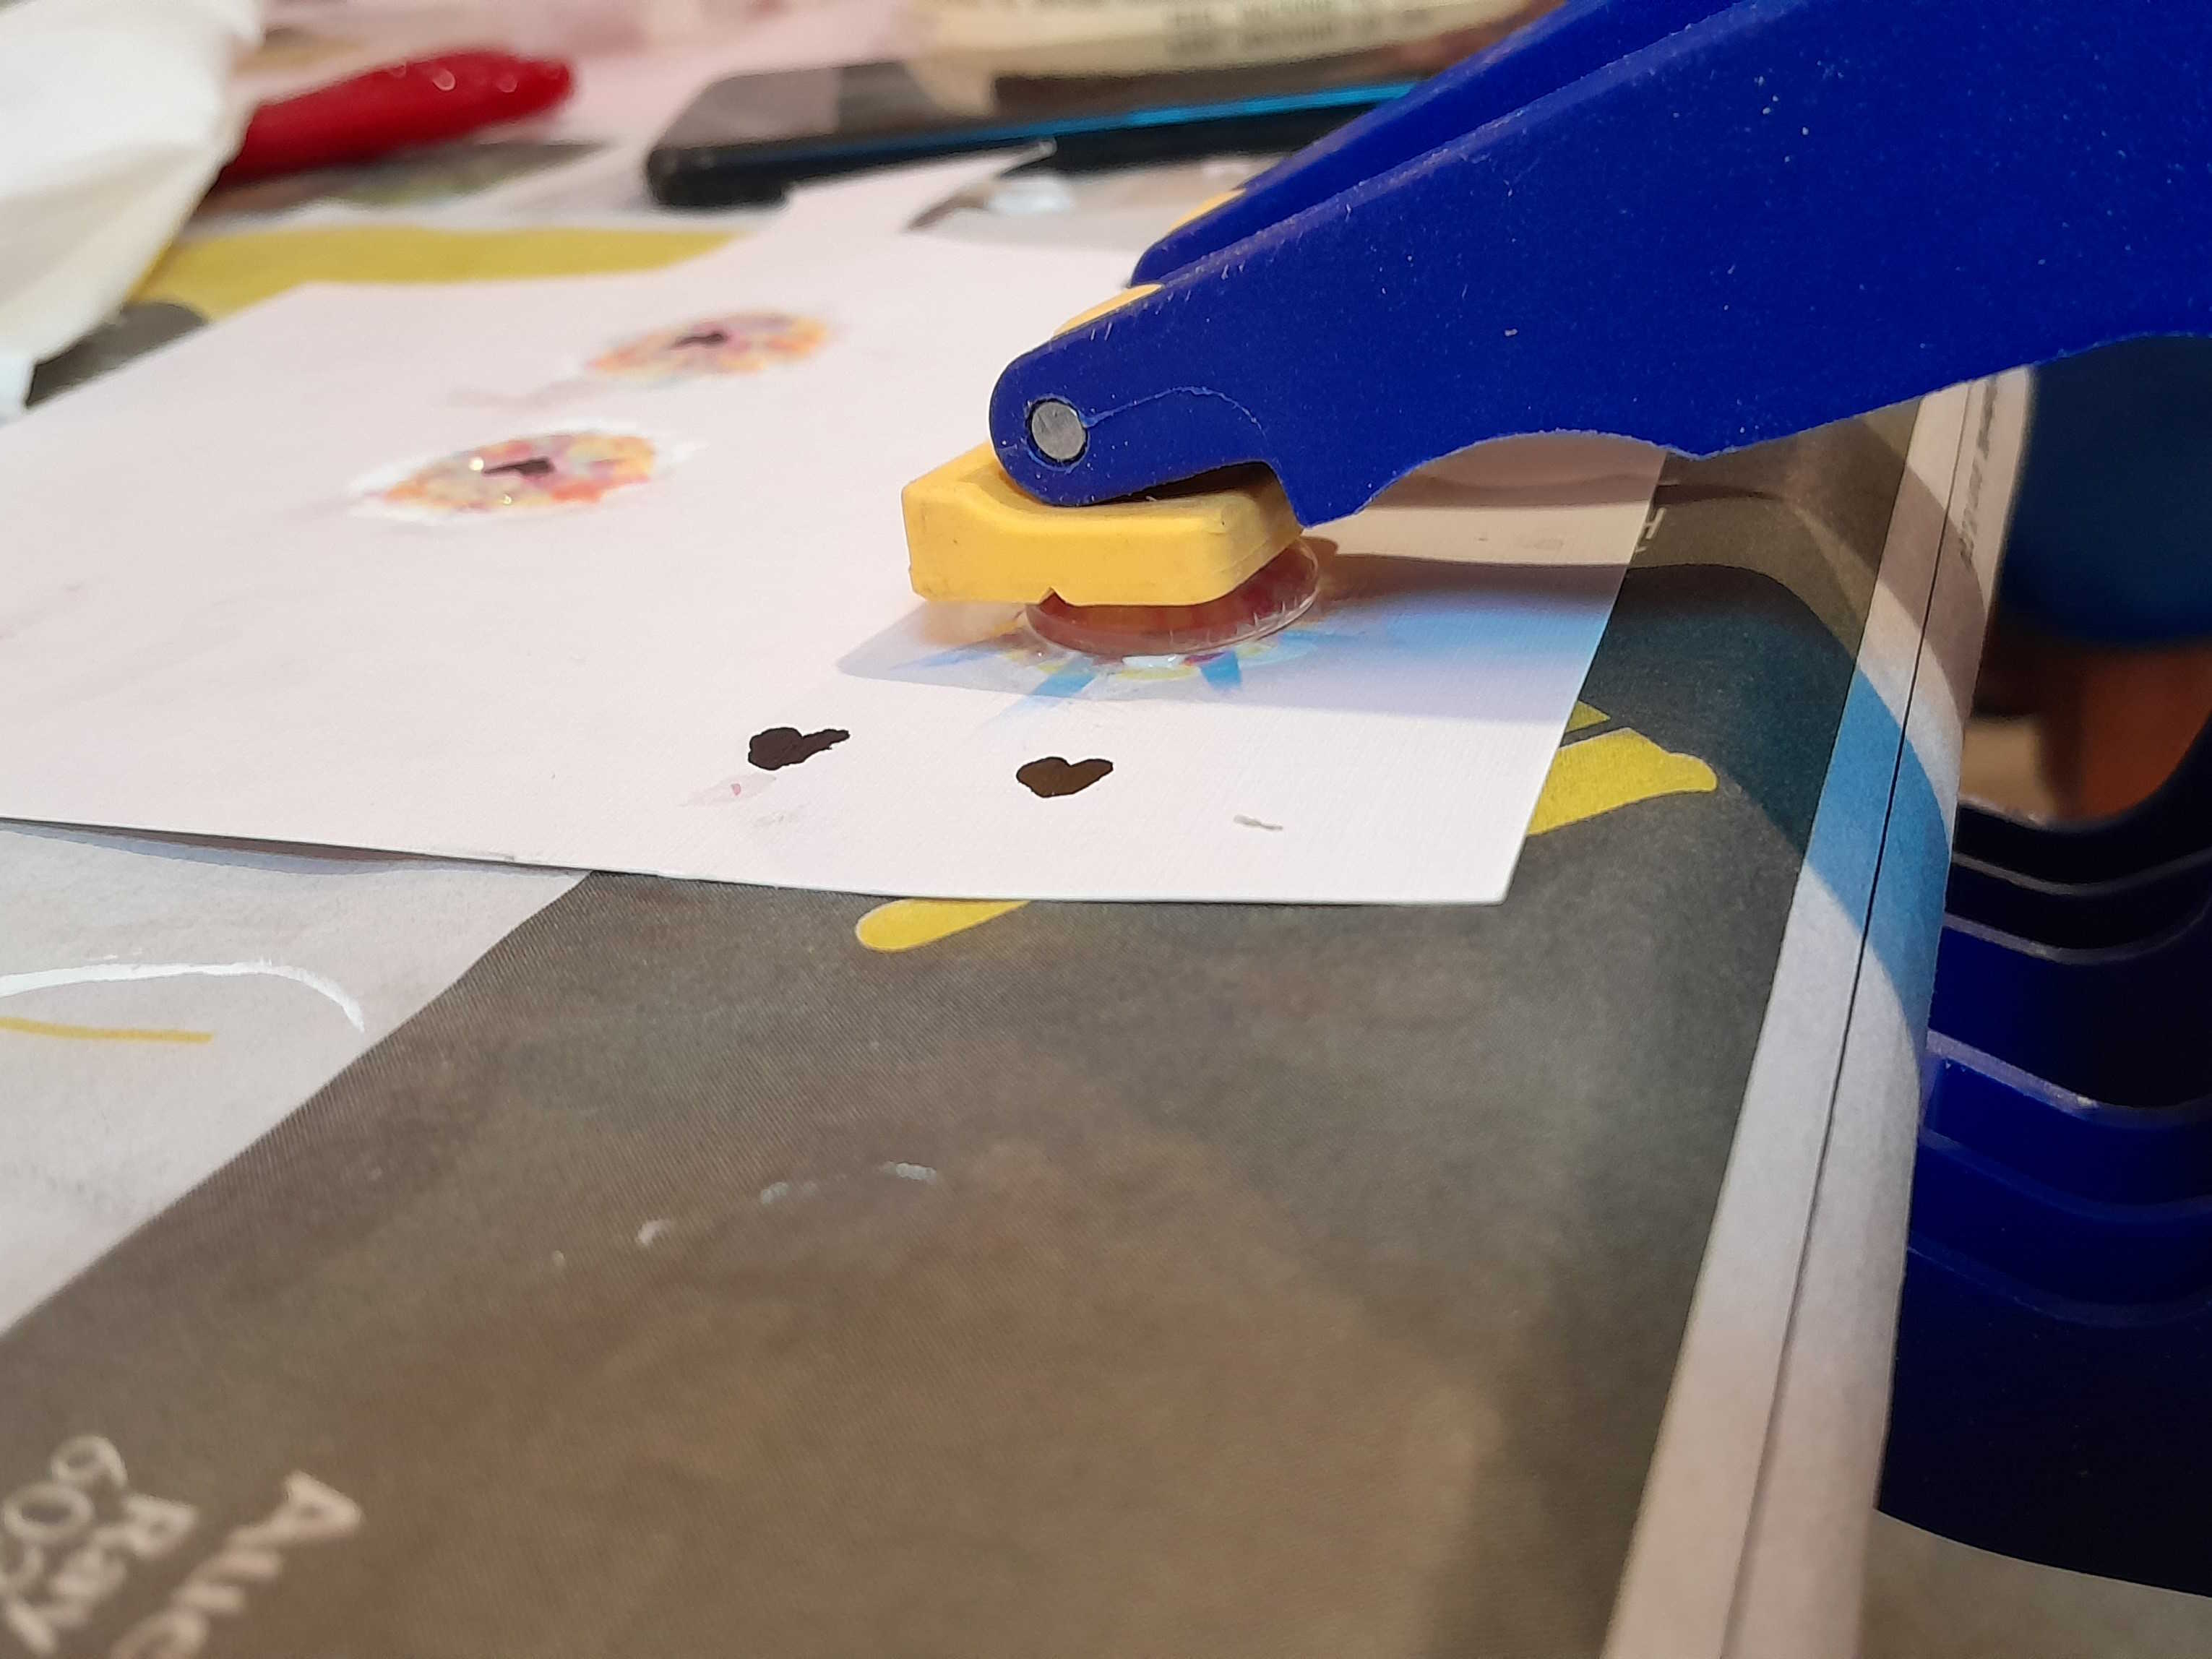
... and attempted to finish the eye chips and. um. failed (>人<;) (top tip! Don’t use your partner’s massive clamps in an attempt to squeeze the airbubbles out!) I peeled the eye chips off before they had dried and tried again.
Jan 30th
In the morning I finished painting the new eye chips and set them aside to dry...
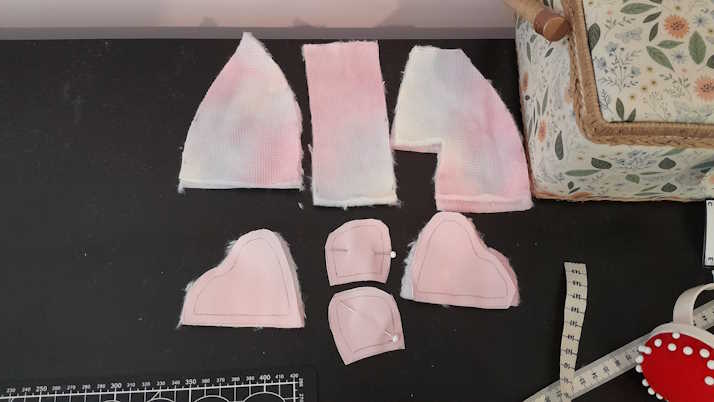
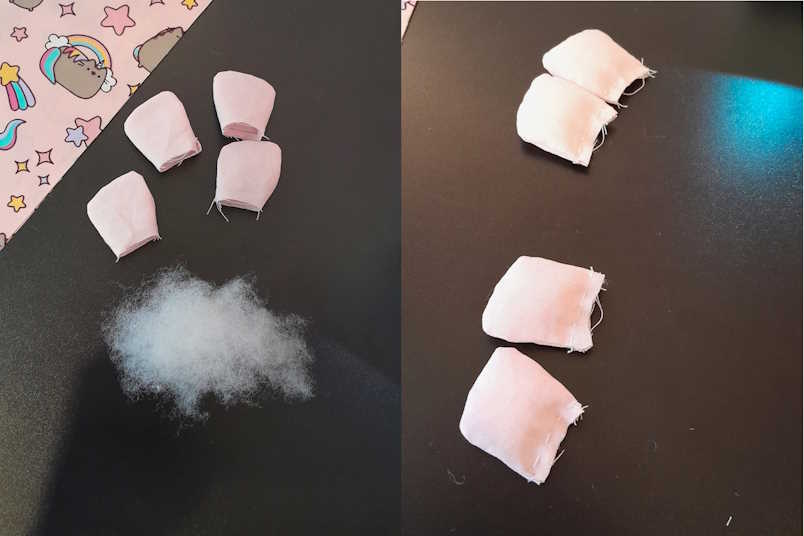
...while I cut out the pieces for the head, ears, and feet (the fluff shed a lot!!)


While the eye chips were still drying, I went out for a drive with my friend to enjoy the sunshine! (hello if you're reading this, which you probably are cause I will have sent this to you <3)
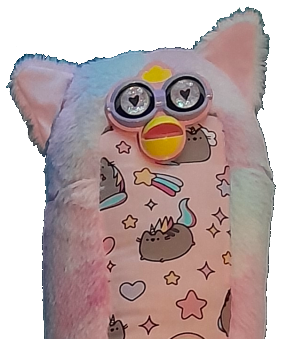
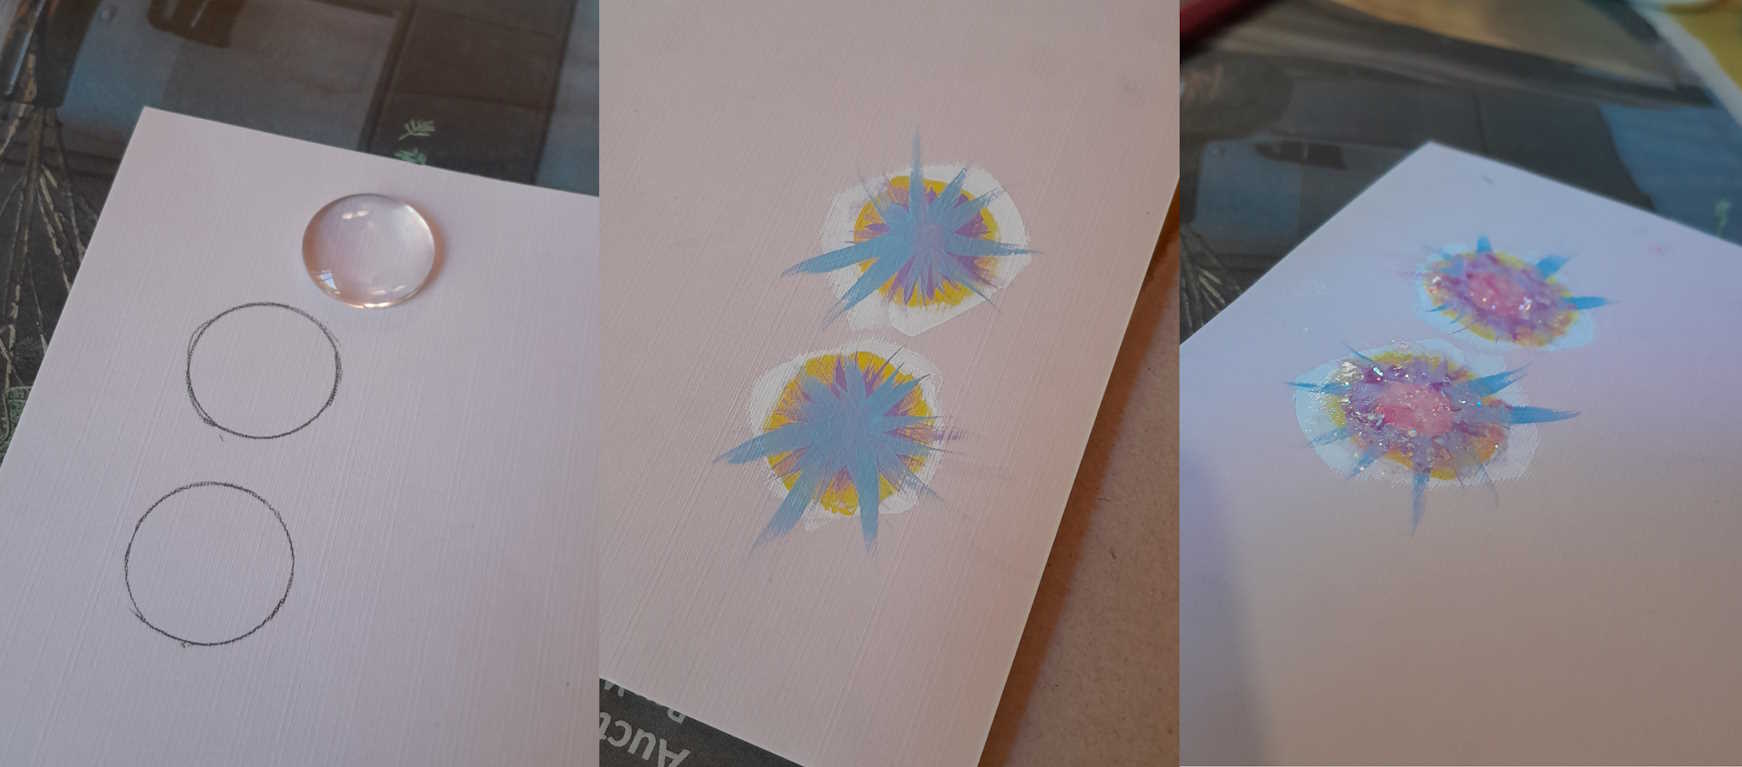
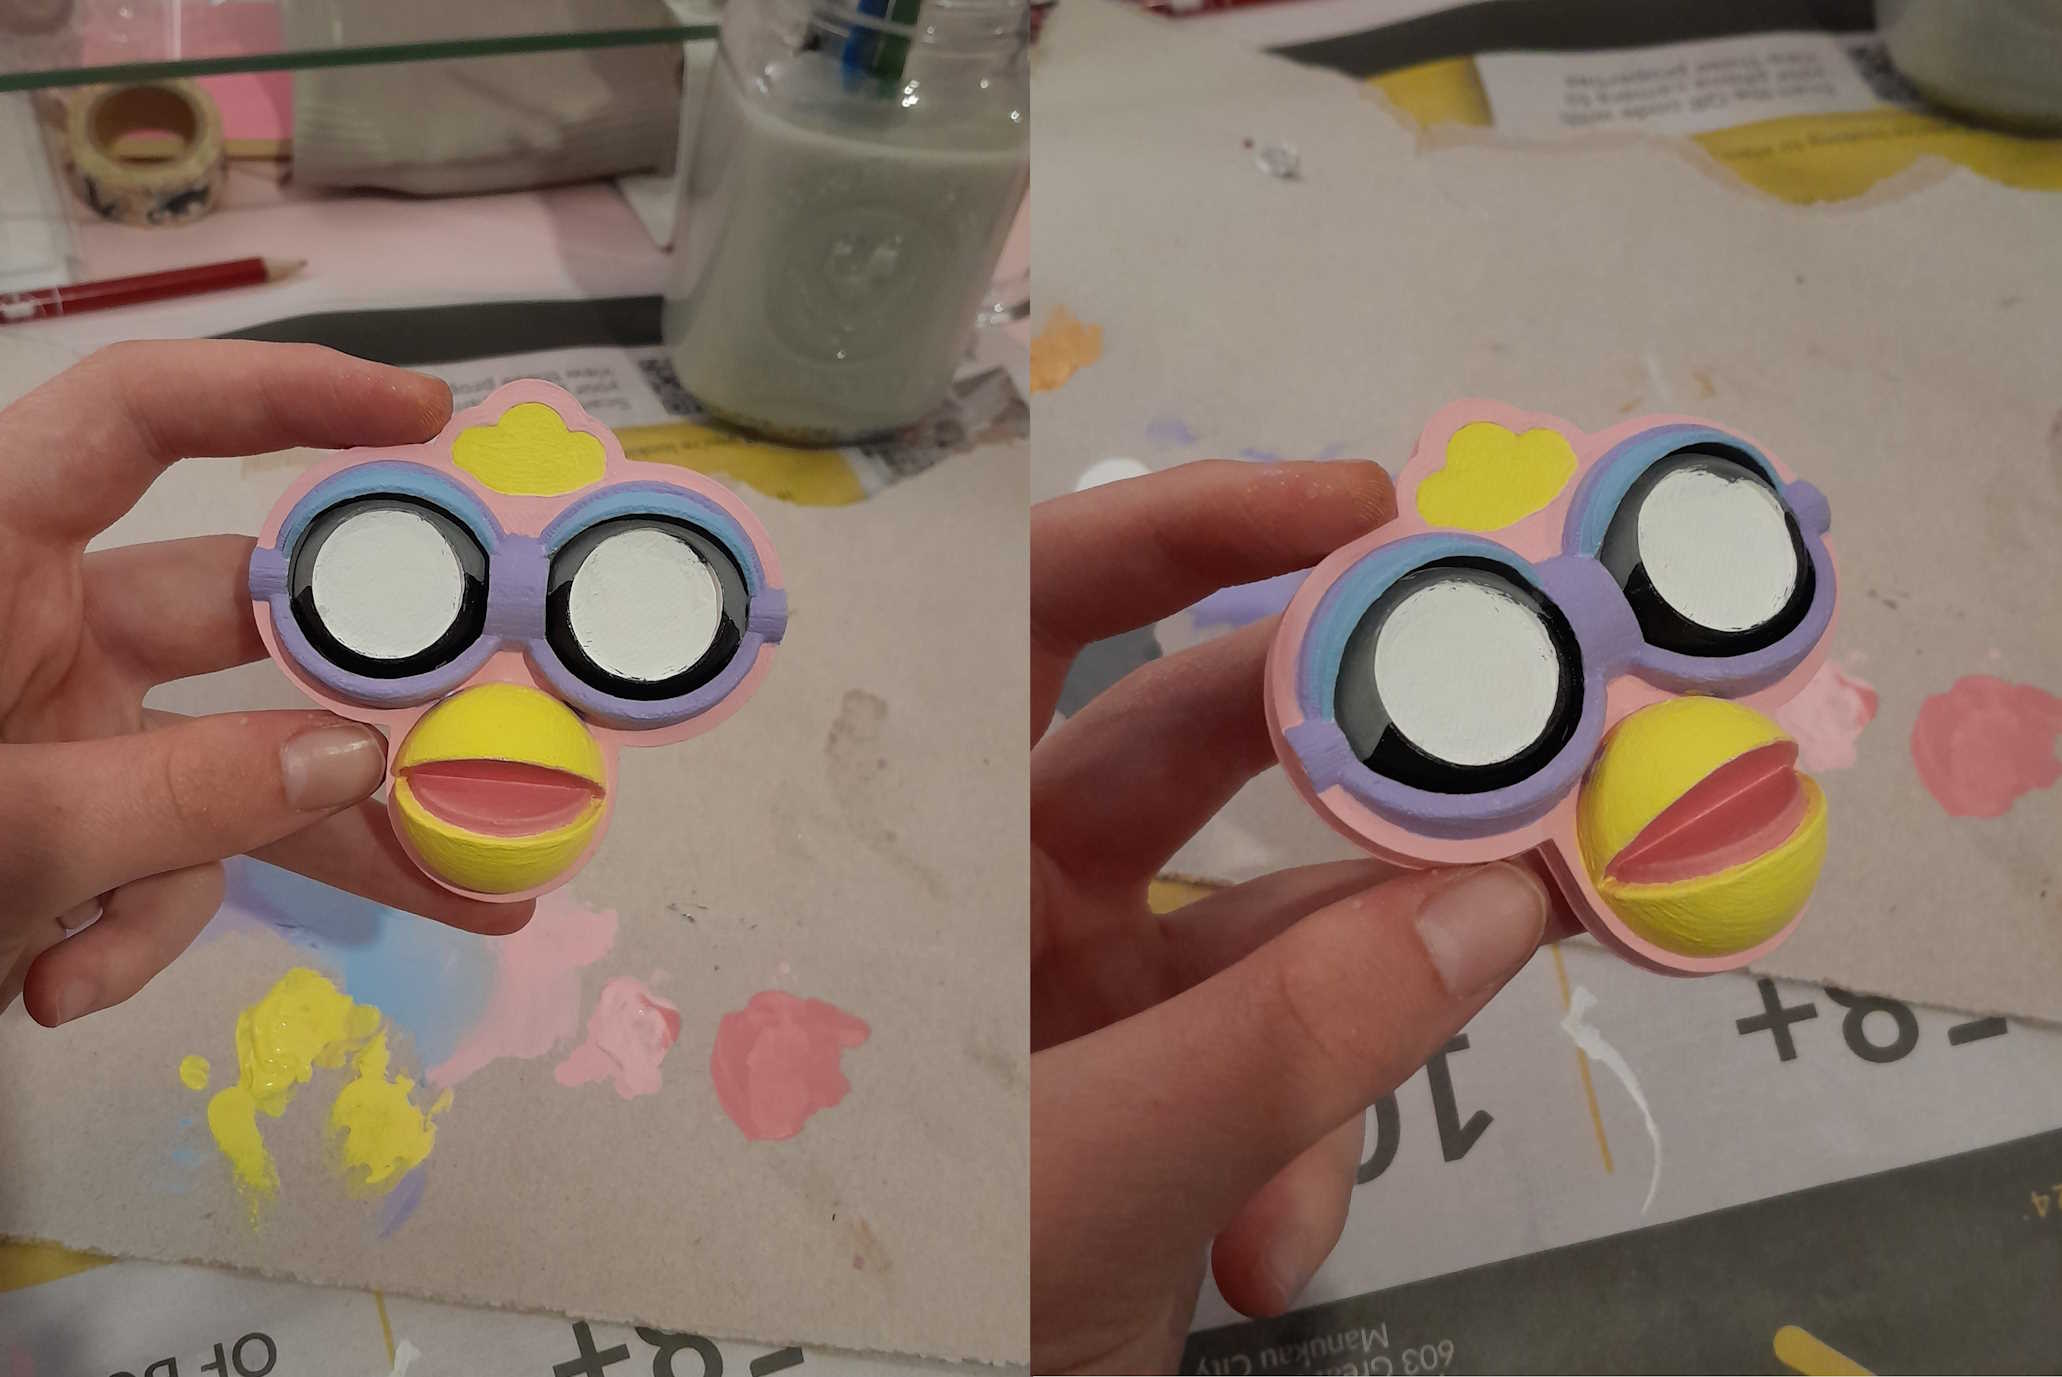
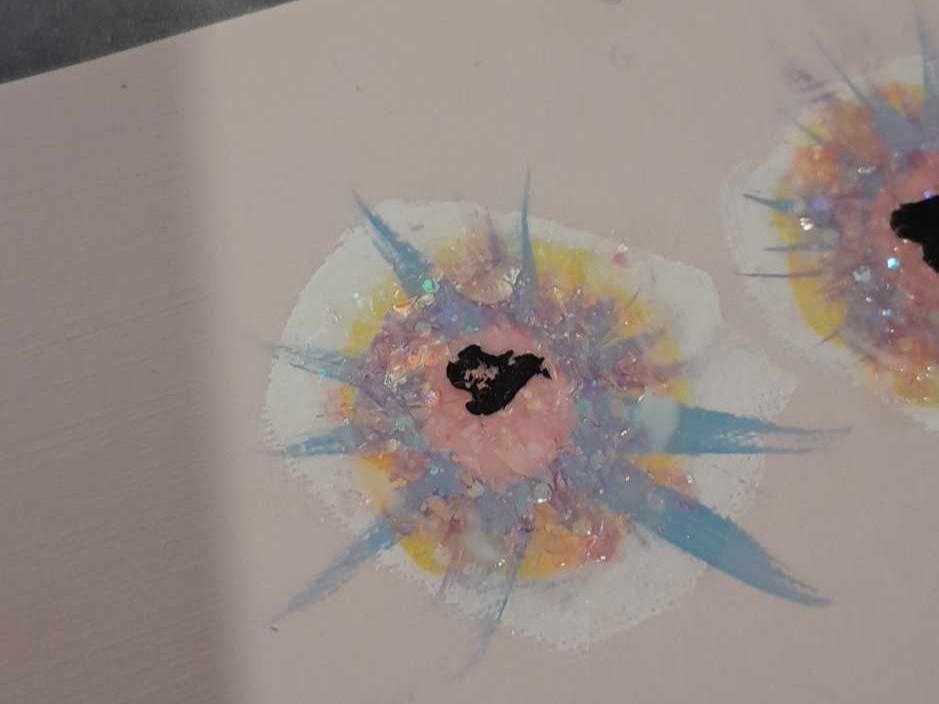
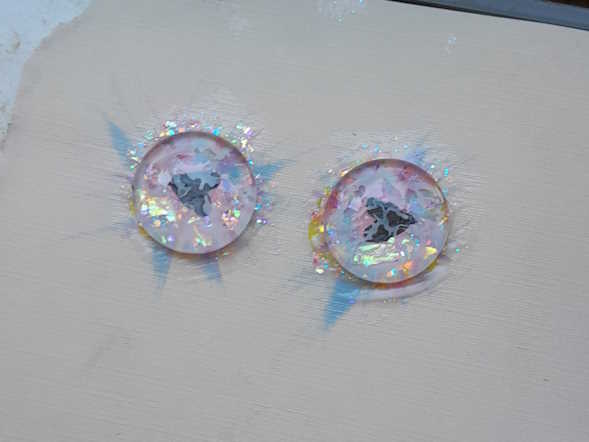
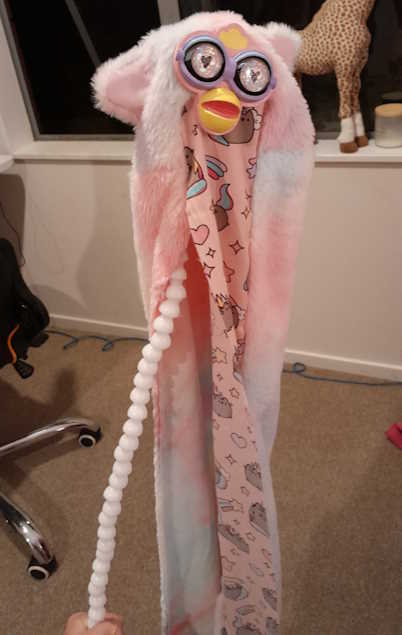
That evening the eye chips had set, and I cut them out, stuck them in, and then face plate was done!!
I'm so happy with how it turned out! It's really hard to capture on camera but the way that the glitter flakes in the eyes capture the light is SO GORGEOUS.
The heart pupils ended up a bit longer than I had originally planned but I actually kind of love how it adds a slightly cursed goat-like vibe to her face ~( ̄▽ ̄)~*

Bertie was unsure about the new development...

Feb 2nd
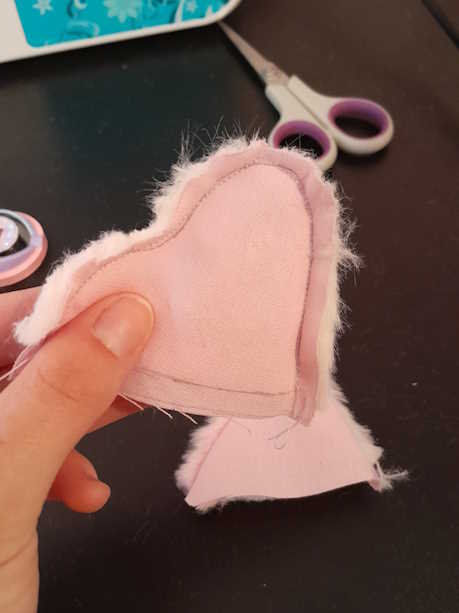
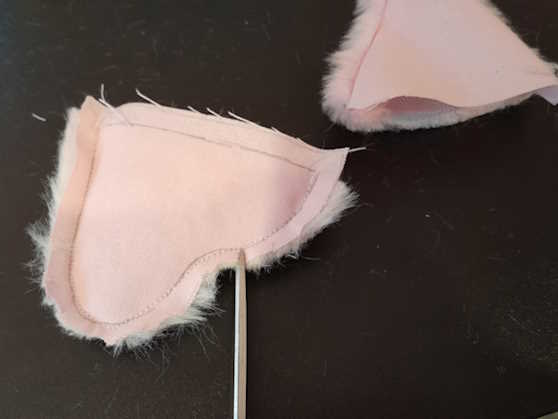
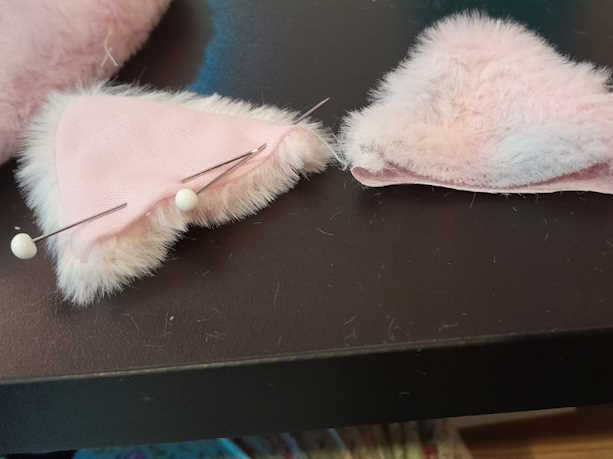
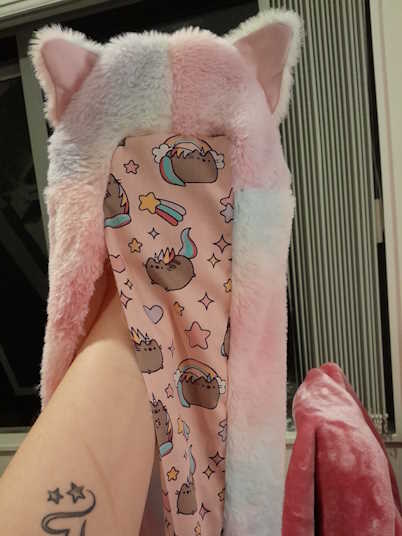
I sewed together all of the headpieces! For some reason they ended up a bit uneven and wonky but the vision was coming together! (and the extra lengths etc. got tied up later.
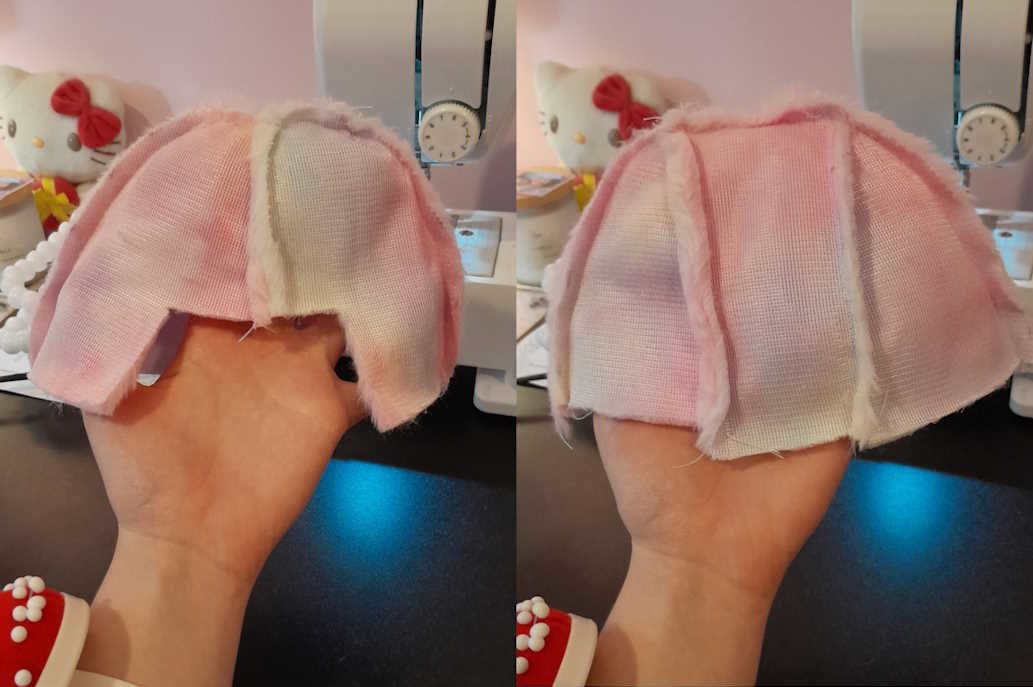
I followed the tutorials above and hand-stitched the ears onto the head after everything else was sewn together, but if I were to do it again I'd just follow my instict and sew them into that sem. I think it would have been a lot easier than it ended up being, and had a cleaner result.

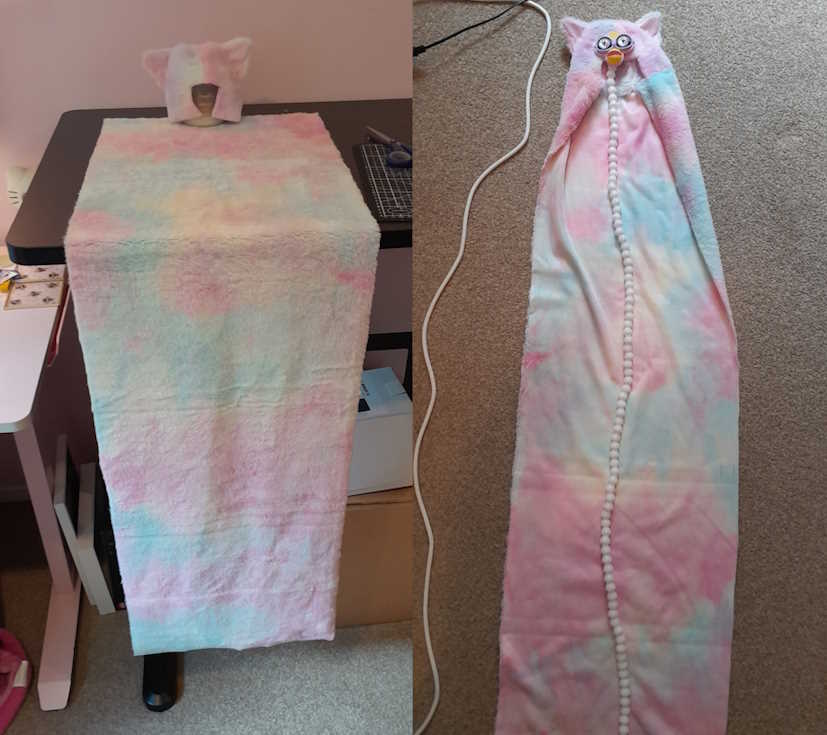
I also cut out the main body length, and attached it to the head. Pics also include me appreciating her full length, and seeing how the spine and faceplate will fit in!
Feb 3rd
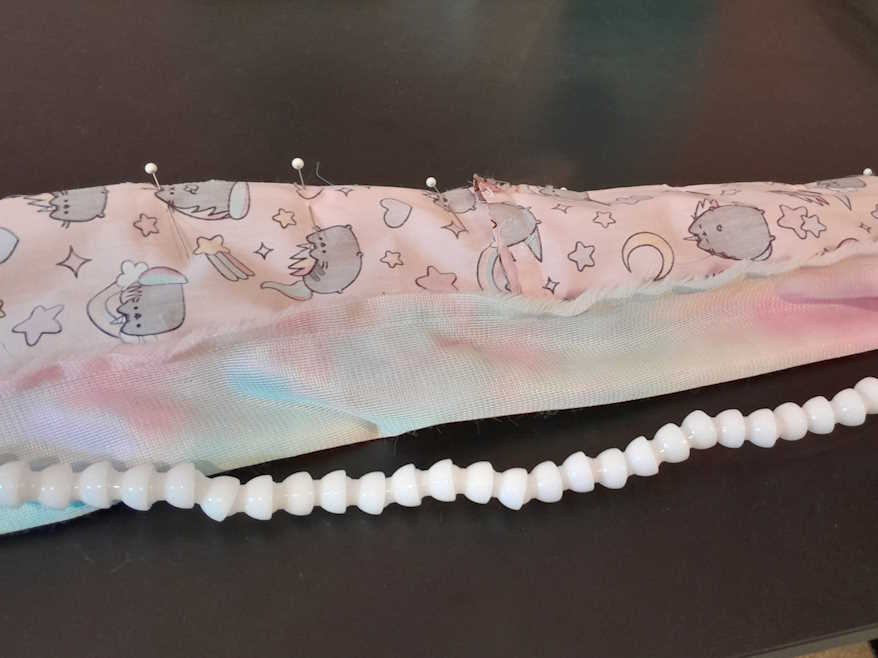
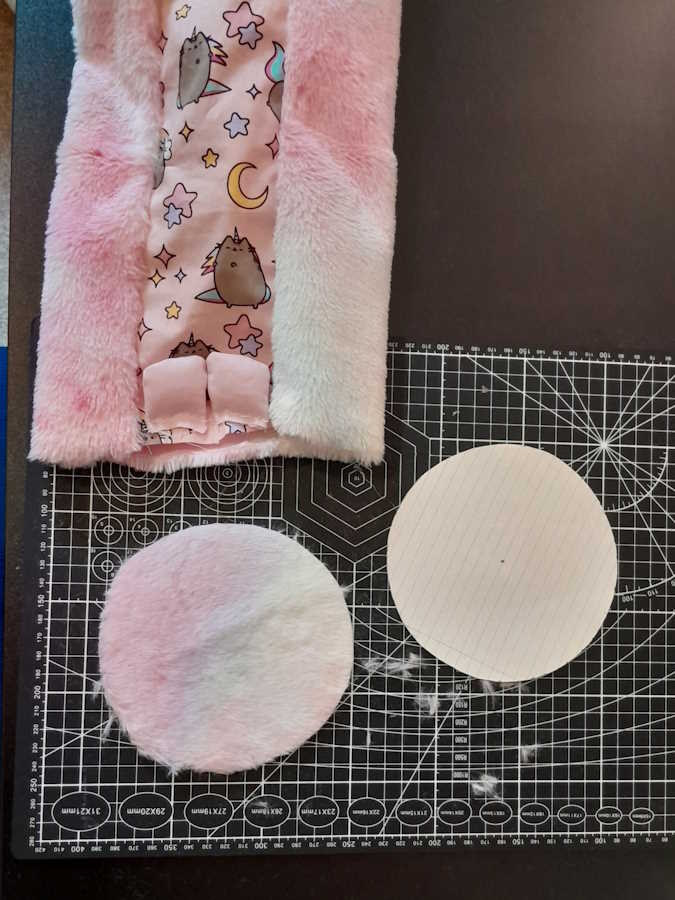
I cut out the belly stripe and connected one side to the main body. But then I realised that I had made a mistake in measuring and it wasn’t long enough, so I ended up unpicking it all and redoing it! My bad!
Feb 4th
I slightly stuffed and sewed up the feet, and cut out a new belly strip! The dimensions and direction of the Pusheen fabric meant that I ended up having to join two strips together, rather than one continuous one. This wasn’t too much of an issue, as I wanted to put some feet in the middle anyway so it worked out well!

Then I was out of town for 2 weeks while I house sat for my parents, so work on Lemon Cake took a pause <( _ _ )>
Feb 20th
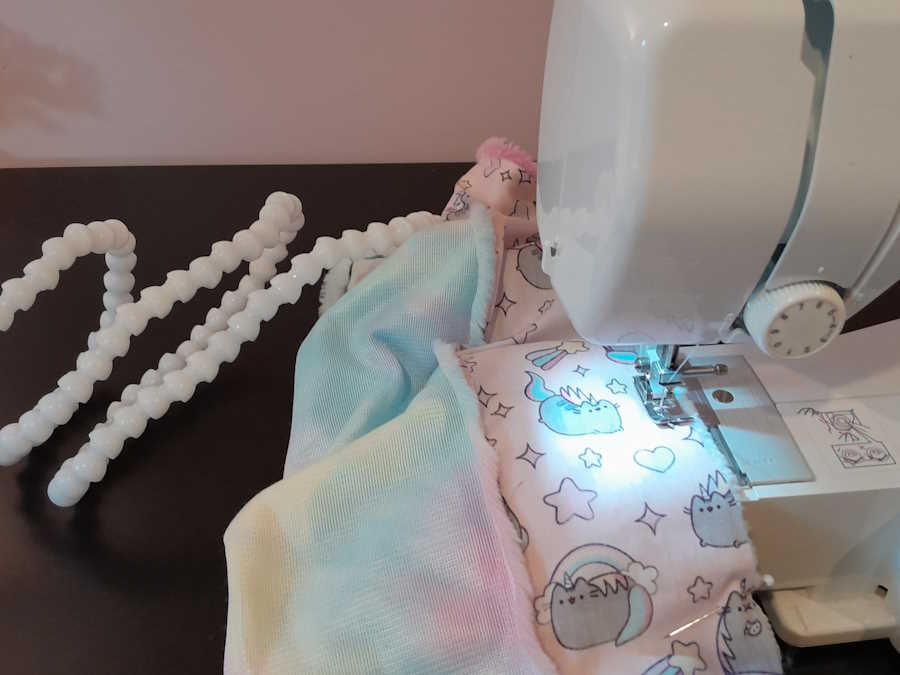
I attached the belly strip to the head, and along the length of one side (leaving most of the other side open for now).
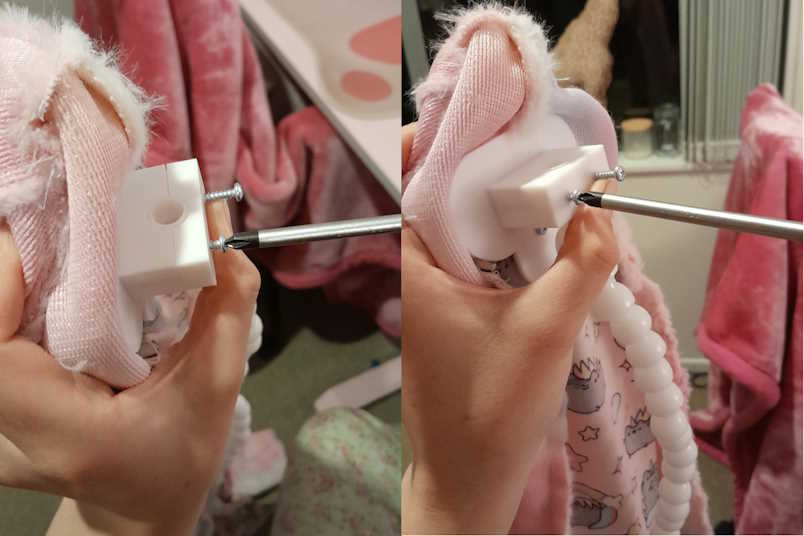
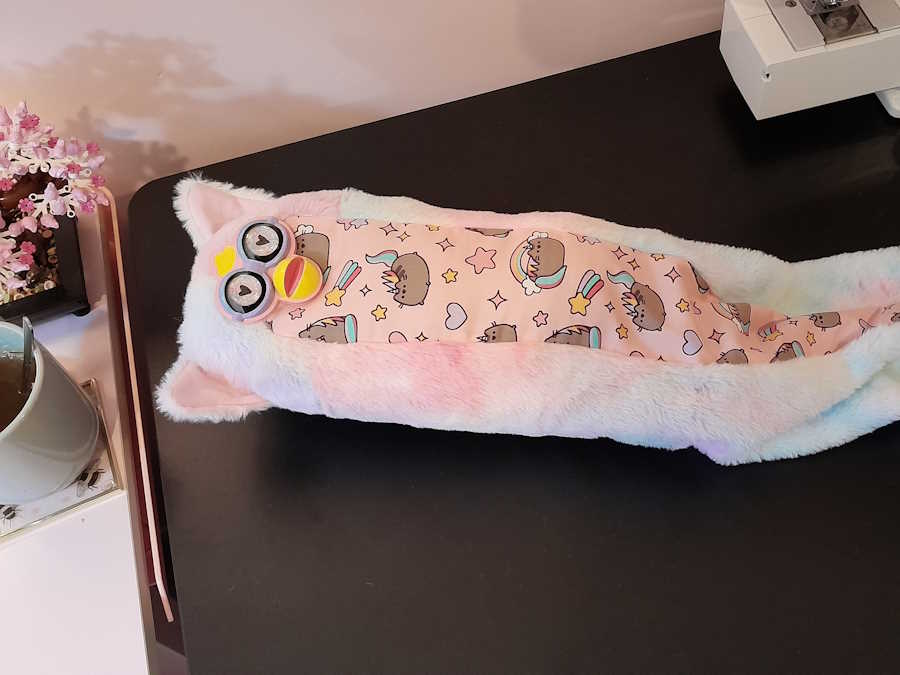
And then came the moment of truth, as I attached the faceplate and spine! This step was particularly exciting and also maybe the most cursed.
Feb 21st
I sewed up the other side of the body, and started stuffing!


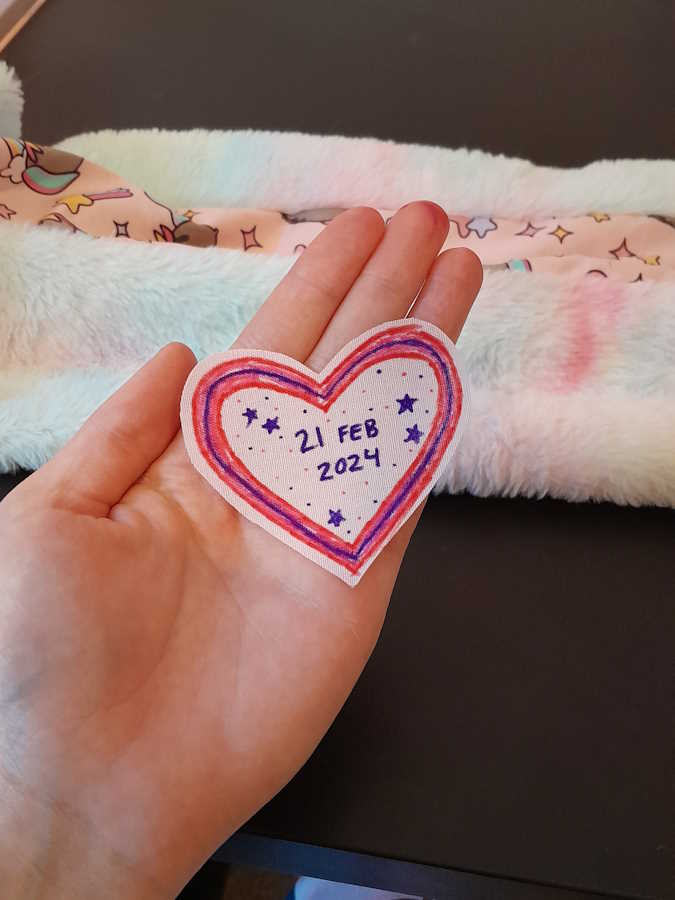
I also whipped a quick fabric heart that I put up near Lemon Cake’s head. I decided that this was her birthday since it was the day that she started taking shape (even though I didn’t finish for a few more days!). This also meant that we share a birthday, which I love!
Feb 23rd
I cut out the butt, and attached it along with the last two feet.
The stuff-ening continues!!
I hand-stitched up the butt, which I did record but I've since lost the footage 〒▽〒 so perhaps some-what anticlimatically...
suddenly... she was done!!!